![]()
Step-by-Step Instructions
How to Use the Ajax Space Control Key Fob
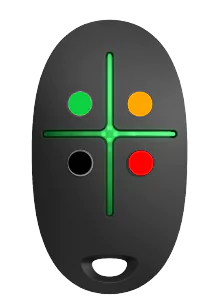
Arm: Green Button
Disarm: Orange Button
Panic: Red Button
Night Mode: Black Button
Armed Successfully: When the Green Arm Button is pressed, two green LEDs illuminate, indicating that the key fob command has been successfully transmitted to the Ajax security system.
Arming Unsuccessful: When the Green Arm Button is pressed, two green LEDs illuminate, followed by the central LED turning red. This indicates that the system has not executed the key fob command and has not been armed successfully. You should check for open doors, windows, and malfunctions within the Ajax security system.
![]()
Step-by-Step Instructions
How to Use the Ajax Keypad Plus with Access Codes
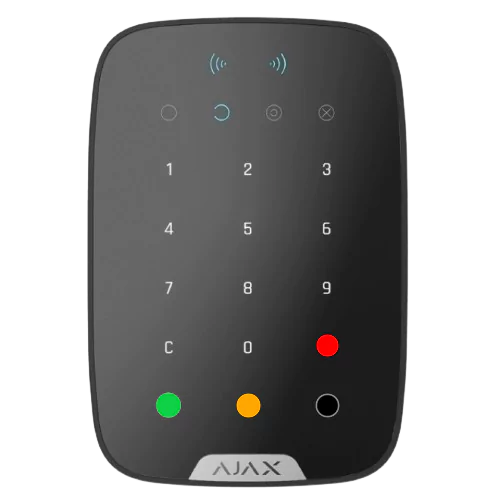
Arm: Green Button
Disarm: Orange Button
Panic: Red Button
Night Mode: Black Button
Step-by-Step: Arming
1. Make sure the door is closed.
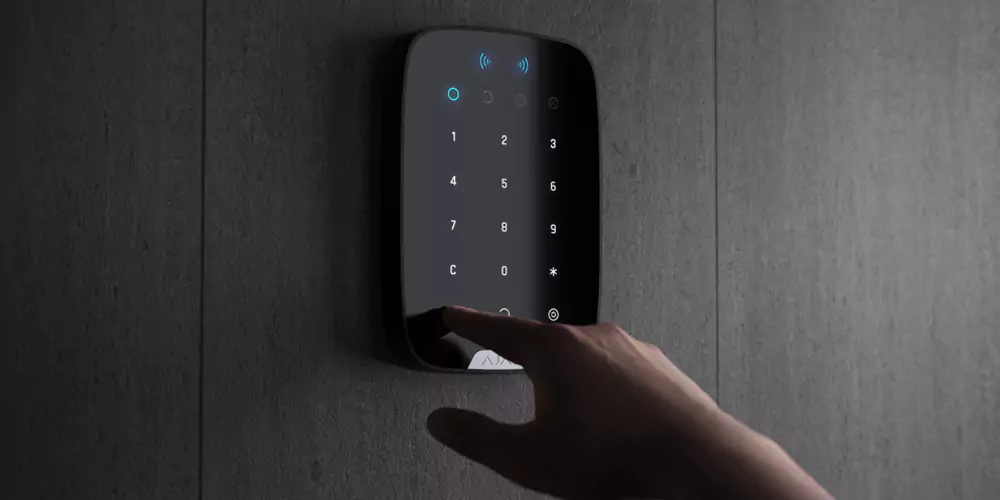
2. To activate the Ajax KeyPad Plus, touch the keyboard, and the backlight will turn on.
3. A beeping sound will confirm the KeyPad is active.
4. Enter your access code.
5. Press the Green Arm Button.
6. You will then hear the countdown for the Exit Delay begin.
7. Open the door, exit, and close it before the Door Opening Contact’s Exit Delay countdown ends.
8. The system is now armed.
Step-by-Step: Disarming
1. Open the door.
2. You will then hear the countdown for the Entry Delay begin.
3. To activate the Ajax KeyPad Plus, touch the keyboard, and the backlight will turn on.
4. A beeping sound will confirm the KeyPad is active.
5. Enter your access code.
6. Press the Orange Disarm Button.
7. The system will be disarmed, and you will hear a confirmation.
Step-by-Step: Night Mode
1. To activate the Ajax KeyPad Plus, touch the keyboard, and the backlight will turn on.
2. A beeping sound will confirm the KeyPad is active.
3. Enter your access code.
4. Press the Black Night Mode Button.
5. The system will enter Night Mode, and you will hear a confirmation.
Step-by-Step: Panic
1. Press the Red Function Button to set off the Panic Alarm.
2. This will activate the Ajax internal and external sirens and send notifications to the mobile app users.
If the keyboard remains untouched for 4 seconds, the Ajax KeyPad dims its backlight, and after an additional 12 seconds of inactivity, the device transitions to sleep mode.
![]()
Step-by-Step Instructions
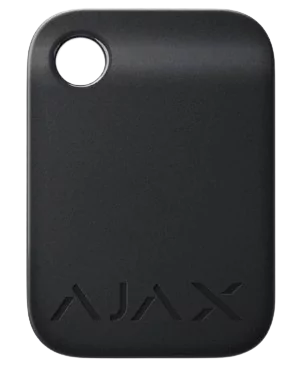
How to Use the Ajax Keypad Plus with Contactless Tags and Passes

Arm: Green Button
Disarm: Orange Button
Panic: Red Button
Night Mode: Black Button
Step-by-Step: Arming
1. Make sure the door is closed.
2. To activate the Ajax KeyPad Plus, touch the keyboard, and the backlight will turn on.
3. A beeping sound will confirm the KeyPad is active.
4. Hold the Tag or Pass Card near the keypad DESFire reader, marked with wave icons on the body.
5. Press the Green Arm Button.
6. You will then hear the countdown for the Exit Delay begin.
7. Open the door, exit, and close it before the Door Opening Contact’s Exit Delay countdown ends.
8. The system is now armed.
Step-by-Step: Disarming
1. Open the door.
2. You will then hear the countdown for the Entry Delay begin.
3. To activate the Ajax KeyPad Plus, touch the keyboard, and the backlight will turn on.
4. A beeping sound will confirm the KeyPad is active.
5. Hold the Tag or Pass Card near the keypad DESFire reader, marked with wave icons on the body.
6. Press the Orange Disarm Button.
7. The system will be disarmed, and you will hear a confirmation.
Step-by-Step: Night Mode
1. To activate the Ajax KeyPad Plus, touch the keyboard, and the backlight will turn on.
2. A beeping sound will confirm the KeyPad is active.
3. Hold the Tag or Pass Card near the keypad DESFire reader, marked with wave icons on the body.
4. Press the Black Night Mode Button.
5. The system will enter Night Mode, and you will hear a confirmation.
Step-by-Step: Panic
1. Press the Red Function Button to set off the Panic Alarm.
2. This will activate the Ajax internal and external sirens and send notifications to the mobile app users.
If the keyboard remains untouched for 4 seconds, the Ajax KeyPad dims its backlight, and after an additional 12 seconds of inactivity, the device transitions to sleep mode.
The usage of Tags and Pass Cards is logged in the events feed. The system administrator can revoke or restrict access rights to the contactless identification device through the Ajax app at any time. Additionally, each Encrypted Tag or Pass Card can be connected to up to 13 hubs.
Ajax KeyPad Plus utilises DESFire® technology for swift and secure user identification via Tag or Pass. DESFire® adheres to ISO 14443 standard, boasting 128-bit encryption and copy protection. Widely employed in European transportation and NASA access systems.
![]()
Step-by-Step Instructions
Creating Access Codes for the Ajax Keypad Plus
To create a Keypad access code using the Ajax Security Systems mobile app:
Open the Ajax Security Systems mobile app.
Go to the Devices menu
 .
.Select the hub from the list.
Go to settings by clicking on the gear icon
 .
.Go to the Keypad Access Codes menu.
Click Add Code. Set the username and access code.
The code can contain from 4 to 6 digits.
Click Add to save the data.
Only Admin users have access to this option.
![]()
Step-by-Step Instructions
Adding New Users to the Ajax App
To add a new user to the Ajax mobile app:
Open the Ajax mobile app.
Go to the Devices
menu.Select the hub from the list of devices.
Go to hub settings by clicking on the icon
.Go to Users.
Click the Send Invites button.
Manually enter the email address of the person you want to invite to the hub or select a person from your contacts by clicking the
 button.
Click Continue and confirm the action by clicking Send.
Only Admin users have access to this option.
An invitation to control the system is sent to the specified email address. If the email user has an Ajax account, the hub will automatically appear in the user’s app. The Users menu displays such a person in the Active Users section.
If the user does not have an account, they must install the Ajax app for iOS or Android and use the email address provided when registering. In the Users menu, such a person will appear in the Pending Invites section.
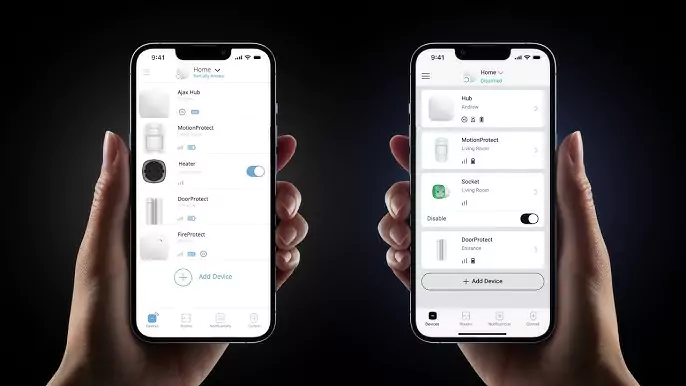
![]()
AJAX NIGHT MODE 
What Is Night Mode and How Does It Function?

Night Mode is a feature designed to provide flexibility and security in your home. When activated, it allows you to selectively arm specific areas while keeping others disarmed. This is ideal for times when you’re at home and only want certain zones protected, such as during the evening when you’re relaxing or moving around the house. In night mode, zones like the front door, patio doors, and windows can be selectively armed to ensure your comfort and safety.
Another example is if you have a PIR sensor installed on the landing. In such a scenario, you might choose to activate night mode to arm everything except for the landing’s PIR sensor. This allows you to maintain security throughout most areas of your home while keeping the landing area free from surveillance, providing you with the flexibility to move around without triggering alarms.
Use night mode only when you’re at home and want to arm specific areas, allowing you to maintain security while still having the freedom to move around comfortably. This feature proves especially useful during evening hours when you’re unwinding or engaging in activities around the house.
By selectively arming designated zones, such as the front door, patio doors, and windows, night mode ensures that your home remains protected while accommodating your lifestyle. Whether you’re relaxing with family or completing chores, night mode provides the perfect balance of security and flexibility.
![]()
AJAX REMOTE PANIC BUTTON
How to Use the Remote Panic Button in the Ajax App
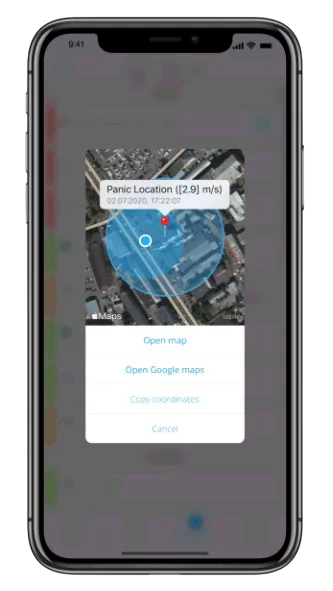
When the panic button is pressed in the Ajax Security Systems mobile app, not only is the event recorded, but the smartphone coordinates are also transmitted to the app. This feature enhances the response capabilities, allowing family members to locate the user swiftly in case of an emergency. This can be especially useful when family or children need help, and they only have a few seconds to react and hit the panic button on the app.
Moreover, system users can easily access and copy the coordinates from the events feed, providing them with additional information and a sense of reassurance during critical situations. By having this feature integrated into the app, families can feel more secure knowing that help can be quickly summoned and that precise location information is readily available in times of need.
![]()
AJAX PARTNER COMPANY BRANDED APP
Access Contact Information Quickly by Tapping Our Logo in the Ajax App
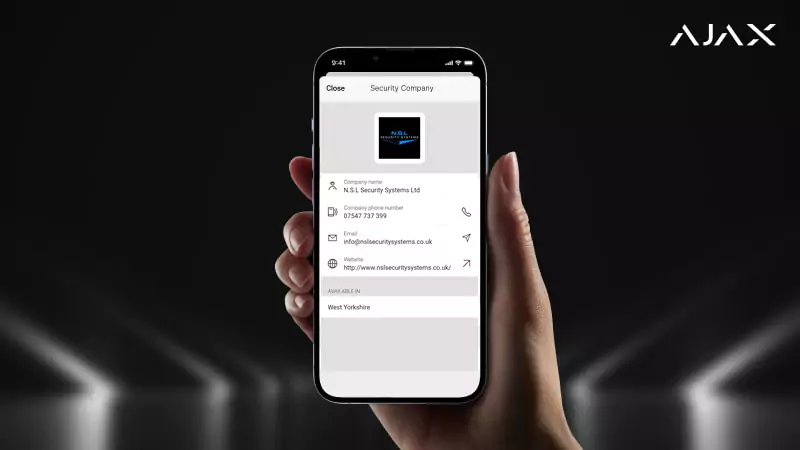
N.S.L Security Systems Ltd proudly announces its partnership with Ajax Systems.
Introducing our exclusive Ajax company branded app, designed to elevate brand visibility and enhance customer service. With our logo featured on the main screen, clients can easily access account status and contact details.
The customer needs to tap on our logo in the top right corner to quickly view our contact information within the Ajax App. This intuitive design feature allows for seamless navigation, ensuring that our customer can effortlessly access key details such as our phone number, email address, and website with just a simple tap.
Whether they need to reach out for inquiries, schedule appointments, or connect with us online, our contact information is readily available for their convenience. This quick access to our contact details is designed to enhance experience and facilitate easy communication with our team.
![]()
BATTERY LEVELS FOR AJAX DEVICES
How Battery Charge Levels Are Shown in the Ajax App
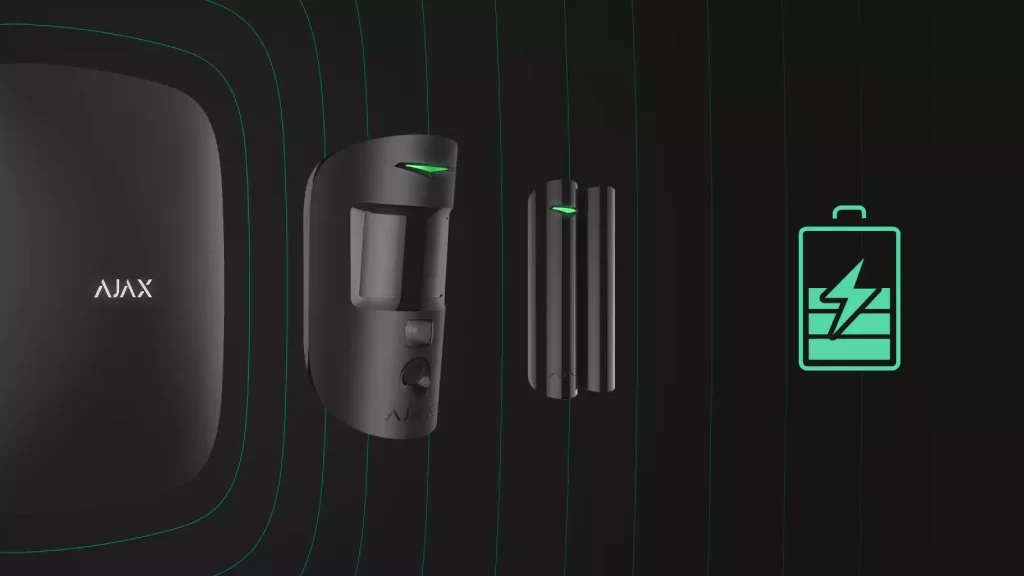
The Ajax system monitors the battery levels in its devices and provides advance warnings when replacement is needed. When the battery charge reaches approximately 10%, users receive a notification in the Ajax app. Depending on the settings and usage conditions, customers have up to 2 months from the notification to contact N.S.L. Security Systems Ltd to handle any battery replacement procedures before the battery is depleted. When the battery is depleted, the device will go offline.
Depending on the device type, the battery charge can be displayed in different ways: as a Percentage or in the text (OK / Low battery).
The charge percentage is displayed in increments: 0%, 10%, 20%, 30%, 50%, 75%, 100%.
Our certified professionals are trained to perform comprehensive device checks during battery replacement, ensuring optimal performance and early detection of potential issues. This proactive approach helps to extend the lifespan of your device and guarantees that it continues to operate at peak efficiency.
Note: This service is available exclusively to N.S.L Security Systems Ltd customers who had the Ajax Intruder Alarm System installed by us but did not opt for the Ajax Aftercare Maintenance Service at the time of installation.
Important Note: We strongly advise customers not to attempt to open or replace the product’s batteries themselves or through a third party. Doing so will immediately void the warranty and may cause irreversible damage to the device. This includes any tampering, modifications, or changes made to the system by you or any third party. Any alterations made to the system can affect its functionality, and as such, will void the warranty. N.S.L Security Systems Ltd shall not be liable for any disruptions, malfunctions, or damages caused by changes made by the Customer.
To ensure your device’s safety and functionality, please use only N.S.L Security Systems Ltd for battery replacements. Our Certified Ajax Specialists will handle your equipment with care, giving you complete peace of mind.
![]()
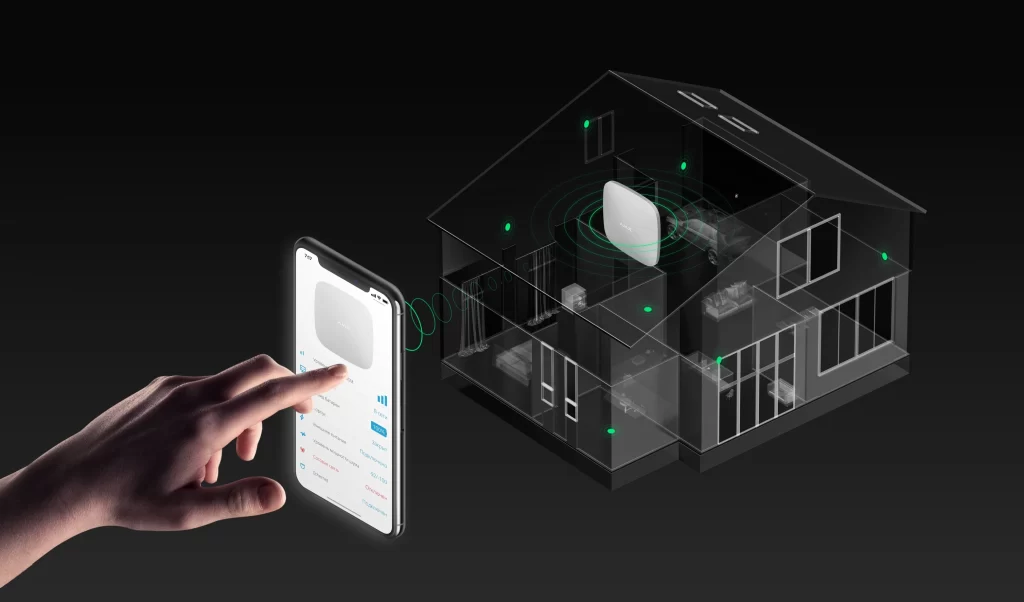
AJAX HUB RADIO COMMUNICATIONS
Evaluating Signal Quality: Noise Levels in Jeweller and Wings Channels

In the Hub information, you can find details about the signal quality for radio Jeweller and Wings under ‘Average Noise’. This provides information about the noise level at the Hub’s location.
The first two values that appear correspond to the average noise level of the two Jeweller channels. The third value corresponds to the noise level in the Wings channel.
-95 dBm or Higher: Indicates Excellent Signal Quality with Minimal Noise at the Hub’s Location.
-85 dBm or Higher: Indicates a High Level of Noise at the Hub’s Location.
-75 dBm or Lower: Indicates Excessive Noise at the Hub’s Location.
Ajax Intruder Alarm & CCTV System
FAQs You Need to Know
Why should I use an authorised Ajax installer?
Using an authorised Ajax installer ensures that your system is installed correctly and meets high standards. At N.S.L Security Systems Ltd, we have received official training and certification from Ajax, so you can trust that your system will be installed efficiently and effectively.
Can I supply my own Ajax hardware for installation?
No, N.S.L Security Systems Ltd does not install hardware supplied by customers. We provide and install our own hardware to ensure quality and reliability. Additionally, we guarantee that you receive devices with the latest production dates and factory default installed firmware.
What happens if I purchase Ajax hardware from an unauthorised source?
Purchasing Ajax hardware from unauthorised sources is against the rules set by Ajax and N.S.L Security Systems Ltd. To ensure compliance with our standards and guarantee the quality of your security system, we strongly recommend acquiring hardware exclusively through N.S.L Security Systems Ltd.
How long is the warranty for Ajax products?
Ajax products come with a 2-year warranty starting from the date of purchase. During this period, you can receive warranty service for any of our devices exclusively through N.S.L Security Systems Ltd.
What to Do If You’re Not Satisfied with an Ajax Installation by Another Company?
If your Ajax intruder alarm system was installed by another company and you are dissatisfied with their service, need battery replacements, require a complete check-up, or simply wish for a cleaner and more efficient installation, we are here to help. Contact N.S.L Security Systems Ltd for our Ajax Takeover Service. We will thoroughly assess and take over the entire Ajax ecosystem to ensure it meets our high standards for effective security.
Why are installation rules and standards important?
Proper installation and configuration by authorised installers guarantee long-term durability and functionality of your system. They also ensure that your system is compatible with other devices and meets local regulations.
What if I need further assistance with my Ajax security system?
If you need further assistance, please contact N.S.L Security Systems Ltd. We’re committed to providing high-quality service and ensuring your security needs are met effectively.
If you have any insurance requirements related to your security system, please let us know. While we are not affiliated with NSI or SSAIB, we adhere to the highest industry standards, delivering trusted, professional, and expertly installed Ajax security solutions.
Important Note: Ajax recommends contacting official partners to install your devices. This ensures professional installation and expert advice. If you purchase Ajax products through an unauthorised reseller, Ajax will not be responsible for any issues that may occur.
AJAX PRODUCT AUTHENTICITY
Avoid AJAX Gray Imports!
CUSTOMER WARNING: ATTENTION!

Gray imports are products imported and sold outside of Ajax’s official PRO distribution channels, which include installers and security companies. These goods are sourced from other countries where they are often available at lower prices.
Also known as parallel imports or parallel market goods, gray imports do not receive warranty support from the manufacturer. Furthermore, they fail to meet the same rigorous quality standards upheld by products sold through official UK channels. Choosing gray imports not only means sacrificing warranty protection but also exposes you to potential quality issues and substandard performance, compromising the effectiveness of your security measures.
Moreover, gray imports, often originating from unauthorised sources, can pose significant risks to consumers. These include security vulnerabilities such as hacking, as well as issues with poor performance, frequent malfunctions, and outdated firmware. Additionally, gray import products may be unauthorised copies or replicas, lacking the authenticity and reliability of genuine Ajax products. Purchasing such items not only jeopardises your security but also undermines the effectiveness and reliability of your security system.
Ajax does not have authorised representatives selling on platforms such as Amazon, eBay, or similar online marketplaces.
We take pride in offering only authentic products sourced directly from authorised UK Ajax distributors. Therefore, we do not provide gray imports. Our commitment is to deliver quality products backed by reliable warranty support and adherence to industry standards.
Important Note: Ajax is a professional-grade Intruder alarm system, rated 2 and above. Installation is recommended to be exclusively performed by Trusted Partners Authorised by Ajax and accredited. We always provide and install hardware ourselves; we would never install Ajax hardware purchased by the customer!


To support your Ajax alarm system, we offer three professional Ajax service plans – each carefully designed to help prevent system failures, maintain optimal performance, and extend the life of your equipment:
These services are tailored to suit both residential and commercial properties and can help you stay compliant with your insurer’s requirements.
✅ Ajax Remote Monitoring Service (ARC)
✅ Ajax Aftercare Maintenance Service
✅ Ajax Hub SIM Card Service
Ajax Remote Monitoring Service (ARC)
24/7 monitoring with immediate response, ensuring swift action in the event of an alarm activation.
Ajax Aftercare Maintenance Service
Regular routine checks and preventative maintenance to keep your system running reliably and in peak condition.
Ajax Hub SIM Card Service
Keeps your alarm system connected even during power cuts or internet outages.
![]()
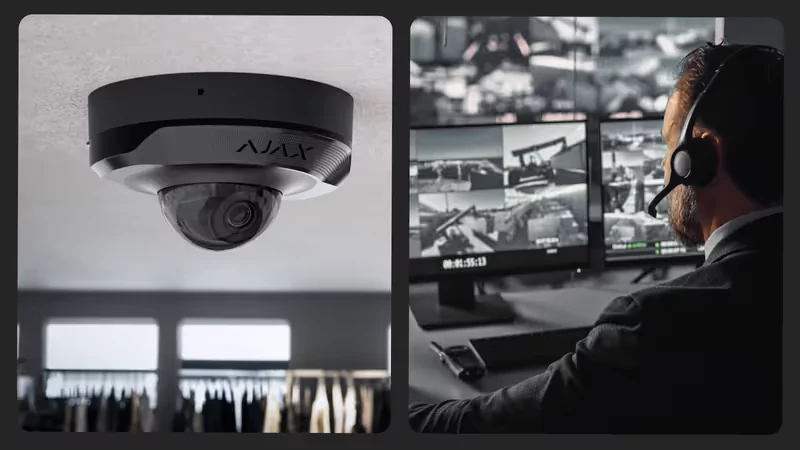
HIKVISION PARTNER COMPANY BRANDED APP
Access Our Contact Information in the Hikvision Hik-Connect App

N.S.L Security Systems Ltd proudly announces its collaboration with Hikvision.
Introducing our exclusive Hikvision Hik-Connect company branded app, crafted to amplify brand visibility and enrich customer support. With our logo prominently displayed, clients can effortlessly navigate to access account details and reach out to us.
This user-friendly feature ensures seamless browsing, enabling customers to swiftly find our phone number, email address, and website.
Whether seeking assistance, scheduling appointments, or connecting with us online, our contact details are readily available for their convenience. This streamlined accessibility is aimed at enhancing the overall user experience and fostering effortless communication with our team.
FAQ: TP-Link Gigabit Powerline Adapters
![]()
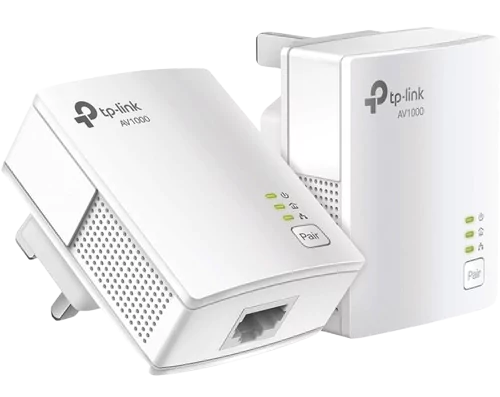
To ensure optimal performance of your TP-Link Powerline adapters, please consider the following criteria:
Electrical Circuit Configuration: The powerline adapters need to be connected to the same electrical circuit, ideally one that runs off a single fuse board. If your home has multiple incoming phases, the adapters may not function properly. However, if all devices are on the same fuse board and use multiple ring mains, the Powerline adapters will work effectively.
Avoid Extension Leads and Surge Protectors: For best results, plug the Powerline adapters directly into wall outlets. Connecting them through extension leads or surge protectors can lead to connection failures or performance degradation.
By following these guidelines, you can maximise the performance and reliability of your TP-Link Powerline network.
FAQ: A Guide to LED Floodlight PIR (Passive Infrared) Sensors and Detection
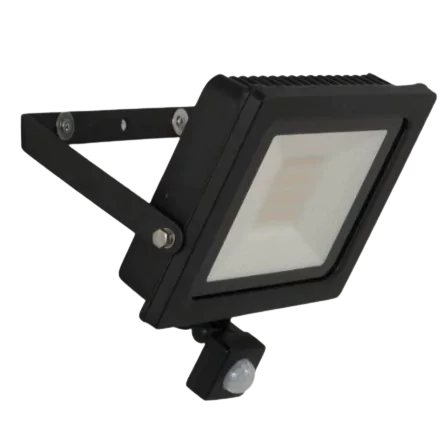
The floodlights come equipped with a passive infrared detector. The LED light activates when movement is detected in the surrounding area or when natural light diminishes at dusk.
PIR (Passive Infrared) sensors primarily detect infrared radiation emitted by warm bodies, typically human or animal heat signatures. However, they can also detect larger warm objects, such as vehicles, under certain conditions. Here are some key points regarding how PIR sensors interact with vehicles:
1. Heat Signature: Cars do emit infrared radiation, especially if they have been recently driven and their engines or components are warm. The heat from the engine, exhaust, or even the body of the car can sometimes be detected by a PIR sensor if it comes into the field of view and is significantly warmer than the surrounding environment.
2. Movement: PIR sensors are designed to detect changes in infrared radiation caused by movement. A stationary vehicle might not trigger a PIR sensor, but if it is moving (e.g., pulling into a driveway or parking lot), the change in thermal signature and movement could potentially activate the sensor.
3. Distance and Angle: The sensitivity of the PIR sensor and its field of view also play a critical role. If a vehicle is too far away or positioned at an angle where the sensor does not effectively register the heat signature, it may not trigger the floodlight.
4. Environmental Factors: Ambient temperatures and weather conditions can influence the effectiveness of PIR sensors. For instance, a vehicle in very cool conditions might not present a strong enough thermal signature to be detected.
Older PIR sensors can be overly sensitive, leading to false triggers that cause floodlights to switch on unnecessarily. However, advancements in technology have significantly improved the performance of modern PIR sensors, reducing the likelihood of false alarms.
In summary, while PIR sensors are primarily designed to detect the heat emitted by living beings, they can sometimes detect vehicles, especially if those vehicles are moving and/or carrying a significant heat signature.
At N.S.L Security Systems Ltd, we utilize high-quality lighting systems that feature advanced PIR sensors and photocells. These superior components minimize the risks of false triggering while ensuring reliable detection and optimal performance for your security needs.
—
Adjustments and Operation Instructions for LED PIR Floodlights:
You can find the dials on the back of the PIR sensor to fine-tune the sensitivity adjustments if the sensor is either too sensitive or not sensitive enough.
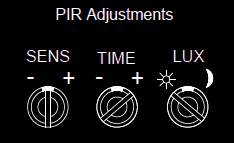
1. Adjusting the Sensitivity: Increase the sensitivity setting to ensure the sensor detects motion more effectively. With this control the sensitivity of the detector can be adjusted, turn the SENS control anti-clockwise to increase the sensitivity.
2. Adjusting the Duration Time: Modify the timer dial to extend the duration that the lights remain on after activation.The length of time sensor remains on after activation can be adjusted from 10 secs to 9 mins. Rotate the TIME control clockwise to increase the duration Note: Once the load has been triggered by the PIR detector any subsequent detection will restart the time period.
3. Adjusting the Lux Control Level: Adjust the Lux setting to allow the lights to activate in lower light conditions. The LUX control module has an in built sensing device (photocell) that detects daylight ( ) and darkness ( ) Rotating the LUX control anti-clockwise will take it from light to dark, set at desired level. Note: You will need to wait 5 secs for the stability of the photocell (CDS) when adjusting the LUX control.
By making these adjustments, you can enhance the performance of your Floodlight PIR sensors.
Operation Mode: When power is switched on, the PIR detector enters into the warm up period (approx 15-30 seconds), the PIR will then change to the AUTO MODE automatically, during the AUTO MODE walk testing can be easily carried out.
Walk Testing: Before walk testing, please put the LUX control to the day position ( ) and the TIME control to minimum (fully clockwise). Once the PIR sensor receives a valid trigger signal (such as body movement) within its detection area, the load / lamp will be turned on for a duration time, You will obtain the desired detection area by walking slowly through the area to be covered.
More information can be found on the printed product Manual sheet located inside the box or provided to you by the engineer.
![]()
For further assistance or any additional questions, please don’t hesitate to contact us.
System Access & Customer Responsibility
![]()
At N.S.L Security Systems Ltd, we are committed to providing advanced, reliable security solutions designed to protect your property and give you complete peace of mind. Our systems are professionally installed and configured to ensure maximum performance and security.
Standard User Access
We provide all customers with standard user access, allowing you to:
Arm and disarm alarm systems
View and manage CCTV footage
Receive alerts and notifications
Control authorised user permissions
Full Administrator Access
Some customers request full administrator (admin) access to their security systems, including alarms, CCTV, and automation controls. While we understand the need for flexibility and control, admin access allows changes to critical settings that can
Compromise the security of the system
Disable important protections
Cause faults or system failures
To safeguard your property and maintain system integrity, full admin access is only granted upon request and requires a signed disclaimer confirming that:
You accept responsibility for any changes made to the system after installation and commissioning.
N.S.L Security Systems Ltd cannot be held liable for faults, failures, or vulnerabilities resulting from system settings being altered after handover.
Additional charges may apply for support if issues arise due to changes made under admin access.
Requesting Full Administrator Access
Please send us an email requesting Ajax Full Administrator Access. Once we receive your request, we will send you the appropriate form to complete.
Our Professional Recommendation
For the ongoing security and reliability of your system, N.S.L Security Systems Ltd strongly recommends using standard user access for day-to-day operation. This ensures your system continues to work as intended and reduces the risk of accidental
If you would like to discuss access options or have any questions, please don’t hesitate to contact us.